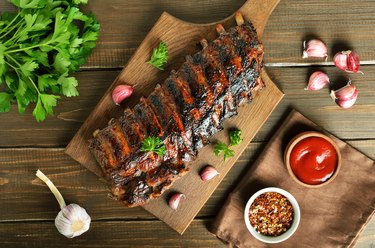
There's no substitute for cooking ribs outdoors over charcoal, but when that isn't an option, convection oven ribs can be a viable alternative. The moving air in a convection oven transmits heat to your ribs more effectively than a conventional oven.
Convection cooking browns the ribs beautifully and helps your spice rub create a barbecue-like surface on the outside. The shorter cooking time also helps keep your ribs moist and juicy.
Video of the Day
Video of the Day
Convection Oven Baby Back Ribs
Step 1: Season Your Ribs
Peel the tough sheet of membrane from the back or concave side of the ribs, and discard it. Rub the ribs with your favorite dry spice rub or wet seasoning paste, then cover them with plastic film wrap and refrigerate them. The spices need at least four hours to begin flavoring the meat, though up to 24 hours is better.
Step 2: Prep Your Dish
Heat the oven to 325 degrees Fahrenheit and turn on the convection feature. Line a sheet pan with aluminum foil or parchment paper to speed cleanup and then arrange the racks of ribs evenly on the sheet.
Step 3: Bake and Baste
Slide the sheet of ribs into your oven and bake them for 2 to 2 1/2 hours, or until the bones move freely when you grasp one and rotate it.
Baste the ribs periodically during the second hour of cooking or brush on a glaze when they're fully cooked and increase the oven temperature to 500 degrees Fahrenheit for five to eight minutes to caramelize the sauce.
Step 4: Remove and Serve
Remove the ribs from your oven and cut the racks into smaller serving portions or individual ribs. Serve hot.
Baking Side or Spare Ribs
Step 1: Trim Your Rack
Remove the membrane, or "fell," from the underside of each rack of ribs. Use a sharp knife to trim off the thin end and lower edge of each rack to give the racks a neater appearance. This is optional, but the trimmed racks will cook more evenly.
Step 2: Add a Rub
Rub the ribs thoroughly with your favorite seasoning paste or dry spice rub, and refrigerate them overnight.
Be aware that adding a rub can significantly increase the sodium content of your meal. According to the American Heart Association, daily intake of sodium should not exceed 2,300 milligrams.
Step 3: Heat the Oven
Heat your oven to 300 degrees Fahrenheit and switch on the convection feature. Line a heavy-duty sheet pan with foil or parchment paper; then arrange the big racks of ribs on it.
Step 4: Slow Roast and Glaze
Place the ribs in your oven, and slow-roast them for 3 to 3 1/2 hours or until a rib bone turns easily when rotated. If you like your ribs to have a cooked-on glaze, baste them repeatedly with your preferred sauce during the last hour of cooking.
Alternatively, glaze them at the end of their cooking time; then increase the oven temperature to 500 degrees Fahrenheit for five to eight minutes, until the glaze is caramelized.
Step 5: Cut and Serve Hot
Remove the ribs from your oven and cut them into individual serving portions of one to four ribs. Serve hot.
Read more: How to Cook Pork Ribs on a Propane Grill
Practice Food Safety
Temperature is an uncertain guide with ribs, partly because it's difficult to use a thermometer in a cut that's very thin and contains so much bone and fat. However, ribs should reach a minimum internal temperature of at least 145 degrees Fahrenheit to reduce risk of harmful bacterial growth, according to the USDA.
Further, the ribs must remain at a temperature of 160 to 180 degrees Fahrenheit for an extended period before their connective tissues fully dissolve, making the meat more tender.
Store leftover ribs in the refrigerator and eat within three to four days, as advised by the USDA. To reduce risk of foodborne illness, discard any food that has been at room temperature for more than two hours.
Things You'll Need
Dry spice rub or seasoning paste
Plastic film wrap
Sheet pan
Aluminum foil or parchment paper
Basting brush
Barbecue sauce
Was this article helpful?
150 Characters Max
0/150
Thank you for sharing!
Thank you for your feedback!