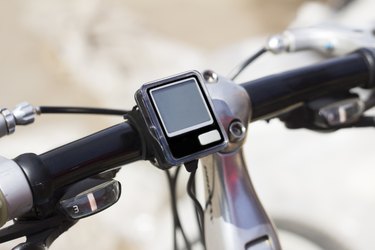
Bell bike computers are devices designed to attach to your bicycle and record certain types of information, such as the distance you have traveled and the speed at which you move. A magnet and a sensor unit attached to the front of the bicycle track the movements of the front wheel. This data is then relayed to the computer, which performs calculations based on the size of the wheel and the number and rate of wheel revolutions.
Setting
Video of the Day
Step 1
Place one end of a measuring tape at the top edge of one of the bicycle's wheels. Pull the measuring tape across the center of the wheel. Note the distance between the top and bottom edge of the wheel.
Video of the Day
Step 2
Press the button on the right side of the bike computer repeatedly to set the appropriate wheel factor. Bellbikestuff.com recommends if you are using the computer with a road bicycle, input 1596 for 20-inch wheels, 1759 for 22-inch wheels, 1916 for 24-inch wheels, 2073 for 26-inch wheels and 2124 for 27-inch/700c wheels. If you are using the computer with a mountain bicycle, input 1888 for 24-inch wheels, 2045 for 26-inch wheels, 2155 for 27-inch wheels and 2237 for 28-inch wheels. Press the button on the left side of the bike computer to save your wheel factor setting.
Step 3
Press the right button to set the computer to display distances in kilometers or miles, as desired. Press the left button to save your display setting.
Step 4
Press the right button to set the computer's clock to display in 12-hour or 24-hour format, as desired. Press the left button to save your format setting.
Step 5
Press the right button to set the computer to display user weight in kilograms or pounds, as desired. Press the left button to save your weight setting. Press the right button to input your current weight, then press the left button to store the weight data.
Step 6
Hold down the right button until the computer's clock begins to flash. Press the right button repeatedly to set the current hour, then press the left button to proceed to the minutes setting. Set the minutes in a similar fashion, then press the left button to save your clock settings.
Operation
Step 1
Begin pedaling the bicycle to automatically activate the computer. Press the right button to cycle through to the current speed display. Note the current speed, then press the right button to cycle to the calories burned display. Press and hold the left button to reset the calories burned display, if desired.
Step 2
Press the right button to access the distance traveled display. Note the current distance traveled. Press and hold the left button to reset the display, if desired.
Step 3
Cycle through the trip timer, odometer, average speed and maximum speed displays in a similar fashion. Reset any of the displays, if desired, by holding down the left button.