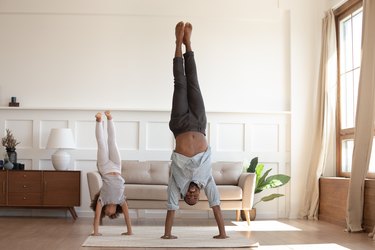
Handstands aren't just a cool party trick or Instagram-worthy photo op, they're a challenging, full-body workout, too. And anyone who's ever attempted this upside-down move can attest that they require Hulk-like strength, control and balance.
But handstands and other inverted poses don't just give you a new, upside-down perspective. "I'm a huge proponent of handstands for the simple reason that for me it feels healthy and even childlike to go upside down!" says Peloton's yoga guru Ross Rayburn.
Video of the Day
Video of the Day
Although most of the reported benefits of hanging out upside-down are anecdotal, inversions have been touted for many years as a healthy way to allow gravity to positively affect blood flow, reverse swelling and stimulate the adrenal glands.
So if your handstand-filled social media feed is giving you FOMO, Rayburn is here to share tips to help you nail handstands of your own!
Can Anyone Do a Handstand?
"If you have low blood pressure, vertigo or another condition that your doctor recommends the avoidance of inversions, please listen to that advice," Rayburn says.
"Please pay attention to wrist, neck and lower back pain while getting into or in a handstand," he says. Proper stretching before and after attempting this deceptively challenging pose is the key to a long and healthy yoga practice.
The Best Poses to Build a Perfect Handstand
When it comes to attempting handstands, "in terms of muscle groups, all of them need to be ready," Rayburn says. Just like a perfectly straight mountain pose (Tadasana) is a reflection of true balance, posture and strength, the handstand is the end result of hard work, dedication and practice.
A strong core and balance are, of course, key to any good yoga pose. But for the handstand, you'll also need strong inner and outer thigh muscles to hold your balance when you're inverted, Rayburn says. In the upper body, the focus is on the shoulders, coupled with strong but open upper-back muscles.
1. Upside-Down L Pose
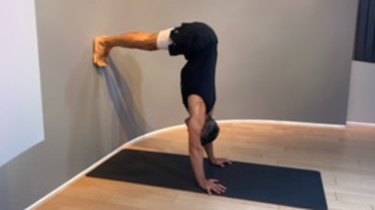
- Start in a short downward-facing dog with you heels touching the wall.
- Walk your feet up the wall to the level of your hips, forming a 90-degree L shape perpendicular to the ground.
- Draw your bellybutton toward your spine and work your thigh bones up into the hamstrings. Stay here for five breaths.
- Then come down and hang out in a standing forward fold.
2. Downward-Facing Dog Flow
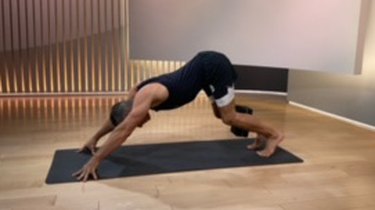
- Begin in chair pose (semi-squat position with arms overhead), placing a block between the shins to build strength in your adductor muscles (inner thighs).
- Next, transition to downward-facing dog, thinking about it in terms of a handstand rather than a shoulder stretch.
- Place a block between your shins and gently squeeze to keep it in place as you hold your pose.
- From downward-facing dog, transition down to a high cobra pose (lying on your stomach and pressing your torso upward and perpendicular to the floor). This helps open the chest and build shoulder and back strength.
Tip
The next time you're in downward-facing dog, Rayburn suggests clawing the floor or tenting your fingertips and engaging the muscles on the underside of the arms as if you were about to kick up into a handstand.
3. Pincha Mayurasana
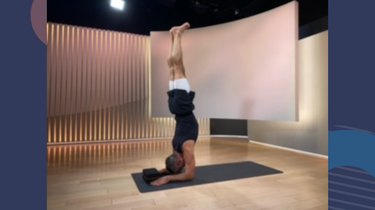
- Begin on your hands and knees (facing the wall if you'd like extra support).
- Bend your elbows so your forearms are flat against the floor and lift your hips, coming into a forearm downward-facing dog (also known as dolphin pose).
- Walk your feet toward your elbows. As you do, your hips will come over your shoulders.
- Lift one leg into a down-dog split position.
- With the other leg, bend and gently kick it up. The goal is to have your body in a straight line from head to heels. You can also start by placing both heels softly against the wall and lifting them off to play with your balance.
Tip
Pincha mayurasana, or feathered peacock forearm pose, is a great shoulder opener and requires less balance than a standard handstand. Be careful not to arch your back or neck.
4. Supported Handstand
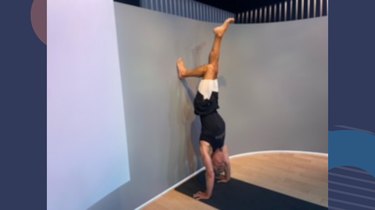
- Start in a short downward-facing dog with your hands about 6 to 12 inches away from a wall.
- Lift your right leg and point through the ball of your right foot. Stare at a the space between your fingertips.
- Bend the left leg and start to hop until you’re vertical. Rest your heels gently against the wall.
- Once you're up, pull your bellybutton to the spine and tilt your tailbone toward your heels.
- Play around with taking one foot then the other off the wall if you'd like.
- Stay here for five breaths, then come down and hang out in a standing forward fold.
Tip
Practicing the kick-up is part of the process, and can be done incrementally, starting small and then getting bolder until you reach the wall. It may take several sessions, but keep practicing!
Every few tries, reset your posture. Stand up, shake out your hands, arms and legs, roll your wrists in circles in each direction and roll your shoulders back and forward a few times. Then check your posture, stand tall in mountain pose and try again!
Related Reading